Hanna G
#BYGRACETHROUGHFAITH
Cauliflower Pizza Crust Recipe (Simply So Good)
Posted on May 16, 2019
 K, SO, I’d been hearing people talk about making and buying cauliflower pizza crust for awhile and even ordered it a few times at a local restaurant. I decided it was time for me to just give it a try myself. After all, I had been having some good feedback from my cooking this year and my kitchen confidence had been recovered! (Baking is another story! HA)
I googled a few different recipes to see what everyone had been normally using, and where they’d differentiate. This one I tried was inspired from the basis of http://www.dearcrissy.com but i improvised at the grocery store for all that I put on mine!
This cauliflower pizza crust recipe makes an AMAZING dinner or even just an appetizer, and I didn’t feel so sluggish after having a couple pieces (THE WHOLE THING) as I do after eating traditional pizza! I actually kind of try to avoid pizza for meals because to me it’s hard to eat something without any nutritional value.
I thought it would be much more difficult than it was, and to my surprise, I actually made these little delicious pizzas for the next 4 days until I finally ran out of my topping ingredients! If you haven’t tried a cauliflower pizza crust recipe yet, you must. You will be amazed by the fact that it really tastes NOTHING like cauliflower. It’s like vegetable-magic!
If you’ve been wanting to try a cauliflower pizza crust recipe, now is the time, and THIS is the recipe! I hope you love it as much as we do! Super quick and EASY!
 Cauliflower Pizza Crust Recipe
Ingredients:
- 1 cup riced, then cooked cauliflower (you can buy the whole head, OR buy a bag of riced cauliflower to save you the process time of washing, slicing, water removal)
- 1/2 cup grated parmesan cheese
- 1 egg, beaten
- 1 tsp Italian seasonings
- 1/2 tsp crushed garlic
- 1/2 tsp salt
- 1/2 cup shredded mozzarella (for topping)
- pizza sauce / toppings of your choice (I’ll cover what I chose in the next set of ingredients)
Instructions:
1. To rice the cauliflower, cut florets into chunks and pulse in a food processor until you see rice-like bits. You could also use a cheese grater to produce the tiny pieces. Do not over process, you don’t want mush. I just bought a bag of already riced cauli at store, super easy and I made 4 pizza crusts out of that one bag.
2. Microwave the riced cauliflower in a bowl for 5-8 minutes depending on your microwave. No need to add water. After microwaving, transfer riced cauliflower to a fine mesh strainer and drain completely, gently pressing out excess water. Once drained, transfer riced cauliflower to a clean dish towel and wrap the sides around the cauliflower while gently pressing out excess water. This drying process is important! I didn’t have to really worry about this part at all so again I’d recommend getting it riced.
3. One large head of cauliflower will yield about 3 cups of riced cauliflower. Use it to make more pizzas immediately, or store in the refrigerator for 2-3 days.
4. Preheat oven to 450 degrees. Spray a cookie sheet with non-stick cooking spray.
In a medium bowl, combine 1 cup riced, cooked cauliflower, 1 egg and your parmesan cheese. Next, add Italian seasonings, crushed garlic and salt. Making sure everything is well mixed, place your “dough” on the cookie sheet and pat out a 9″ round. Be sure not to press it too thin as it’s easy to create holes.
5. Bake your dough at 450 degrees for 15 minutes.

6. Remove from oven. For Traditional: Add sauce, mozzarella cheese, and your favorite pre-cooked toppings to your pizza. Place pizza under broiler just until cheese is melted, be sure to keep an eye on it! For My Toppings List: See below.
I hope you enjoy this wonderful cauliflower pizza crust recipe!
I’m really not a huge traditional pizza person. I love mixing it up, adding meats and veggies, making it more creative and interesting! That’s why I had fun with my toppings list.

My Toppings:
- Shrimp (for the lemon butter shrimp: heat 2 tbsp butter with minced shallots and garlic. place shrimp in pan, season with garlic salt and pepper and cook 3 minutes per side or until pink. Squeeze half a lemon over top!
- Sautéed Portabello Mushrooms (you can use any kind I just love thoseeee) In a pan combine with olive or avocado oil, salt and pepper and a little minced garlic)
- Butternut Squash (cube and bake on 450 for 35 min ahead of time)
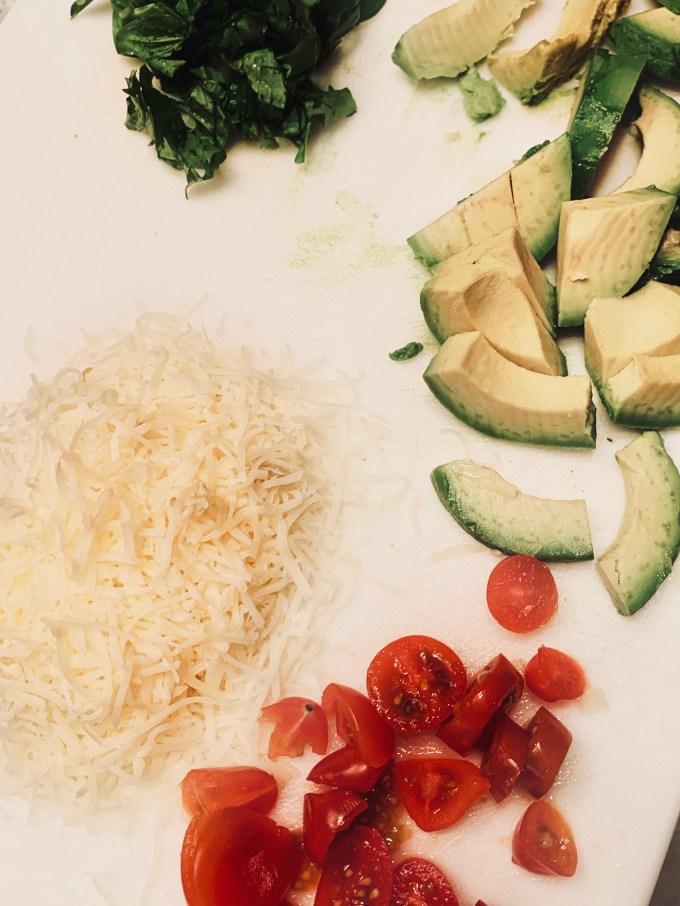
- Avocado
- Tomatoes
- Fresh Basil, chopped
- Mozzarella Cheese
- Goat Cheese
- Arugula
- Olive Oil
Instructions:
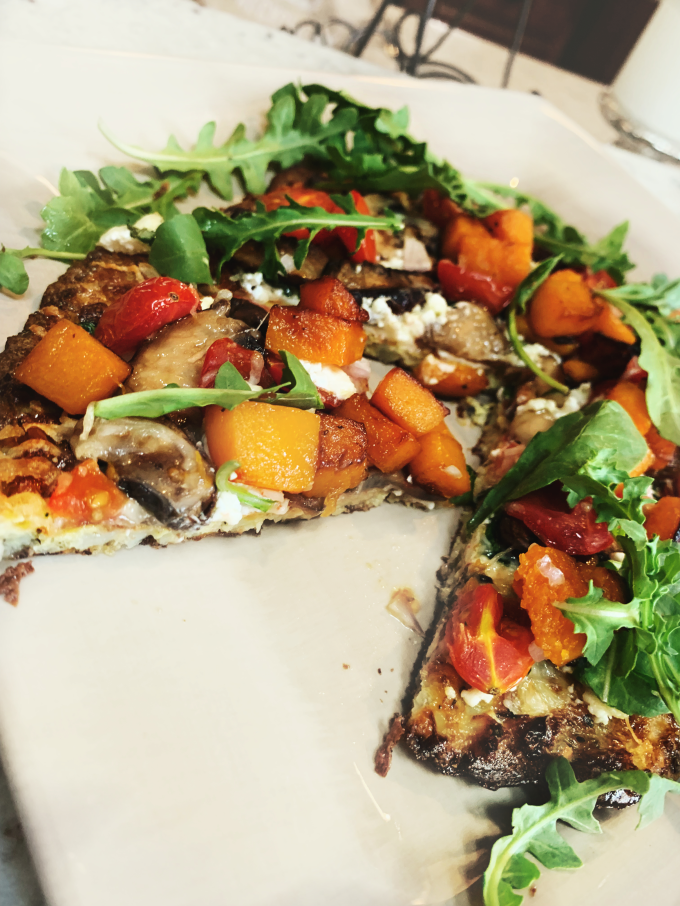
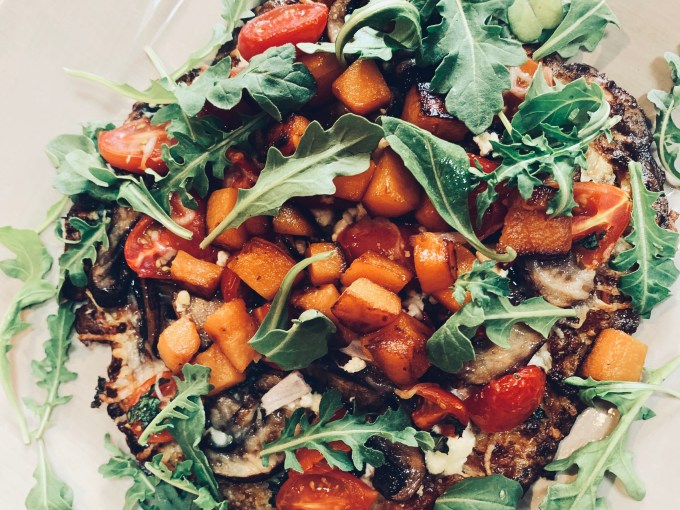
- Remove your cauliflower pizza crust from oven. Sprinkle the desired amount of fresh basil, mozzarella and goat cheese onto the pizza.
- Add the sautéed mushrooms, squash, sautéed shrimp and any other toppings you’d like that can be broiled.
- Place back onto oven rack and broil until cheese melts. Watch closely, it WILL burn if you forget to take it out right away!
- Once cheese is melted you can add your arugula and avocado slides on top! I love the idea that this is basically like a salad HA. Believe me when I say, it’s one of my favorite things I’ve ever made and my NEW favorite pizza! I encourage you to just try it! It’s easier than you think and you will be amazed at how delicious it turns out!
That Sounds Delicious [HelloFresh Recipes We Love]
Posted on May 15, 2019
 HEY GUYS! So this last year I’ve really enjoyed trying out tons of new recipes and sharing them on social for anyone who wants to try! I love to encourage my friends to cook! In the past, I would improvise with several healthy ingredients and it would turn out decent sometimes, sometimes not so much. I actually started cooking a lot when I began partnering with HelloFresh. This is a fairly healthy food service that delivers a box of 2-3 meals every week to your door step; all ingredients measured out, recipe card inside, good to go. The more I followed these recipes, the more confident I became, and I began to learn which ingredients worked well with each other and kind of began creating my own spin on things. If you feel like any of the following applies to you: “I’m an awful cook”, “I don’t have time to cook for my family”, “I hate going to the grocery store and planning out ingredients ahead of time”, “I need new ideas for healthy and quick recipes,” THEN a meal delivery service may be the right choice for you! I’ll just say a few additional pieces before I dive right into the real reason you’re here: EASY AND FUN HF FRESH RECIPES!!


Things I love about HelloFresh:
- I select the meals the week before (or figure it out weeks in advance!)
- Weekly box is delivered to my door.
- Recipe cards have 6 photos along with step by step instructions
- Balanced meals all done within 20-45 minutes time
- It’s given me new confidence in the kitchen and fun ideas to build from!
- $80 off code for you: HMGRIFF80 🙂 Just visit HelloFresh and you can visit my IG page @hmgriff11 to see a few HF meals I’ve prepared on my story highlights!
- They also have a wine club that pairs the right wines with your meals. I’M ALL ABOUT THAT.
My Top 5 HF Recipes
(that you can make on your own too!)
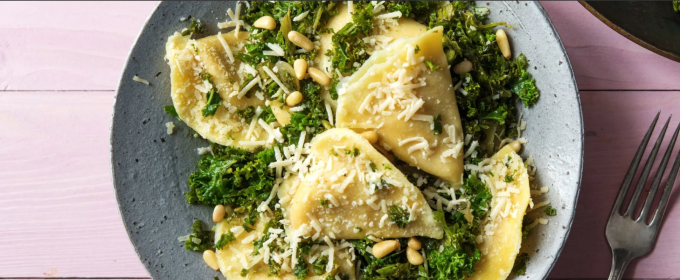
1) Rapid Butternut Squash Agnolotti with Kale in a Sage Brown Butter Sauce
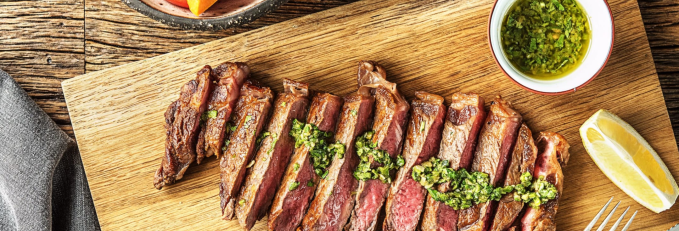
2) Argentine Chimichurri Steak with a Sweet Potato, Poblano, and Tomato Jumble

3) Shrimp and Zucchini Ribbons with Basil Oil over Jasmine Rice

4) Korean Beef Bibimbap with Zucchini, Mushrooms, and Carrot

5) Chicken Pineapple Quesadillas with Pico de Gallo and Southwestern Spices
